
Part 1:Hardware Compatibility & Warranty Considerations
Modifying your GPU or case to accommodate an AIO custom loop may void manufacturer warranties. Always check your GPU vendor’s RMA policy before disassembly.
Select reputable water-cooling brands with clear leak-protection guarantees and strong support policies.
Be aware: users assume full responsibility for hardware damage resulting from installation errors or accidents.
Part 2:Component Selection
- Motherboards: Only ITX or DTX boards fit without obstructing front radiator mounts. (ATX/mATX boards will block radiator clearance.)
- Power Supplies: Use SFX or SFX-L units; (standard ATX PSUs are too large for the reduced PSU bay.)
- GPU Water Blocks: High-end GPUs can be used with custom water-block modifications. Confirm block-to-GPU port alignment and block dimensions before ordering; sizes vary by brand.
- Pump: Select a compact pump whose mounting holes match the case standoffs. Opt for flexible, custom-length cables to ease routing in tight spaces.
- Radiator & Fan Thickness: Choose radiator thickness based on GPU block clearance (details in Step 4).
Part 3: Installation Procedure
Step 1: Adjust motherboard tray to 4-slot position

Detach the middle frame support column (Spacer) and reposition the motherboard tray to 4-slot GPU mode.。
Move the GPU bracket inward to maximize space for the rear radiator.
Step 2: Install Motherboard, Cables & SFX PSU
Secure the motherboard (ITX/DTX) with four screws.
Connect the GPU riser/extender cable.
Mount the CPU water block.
Install the SFX or SFX‑L power supply (ATX units will not fit)

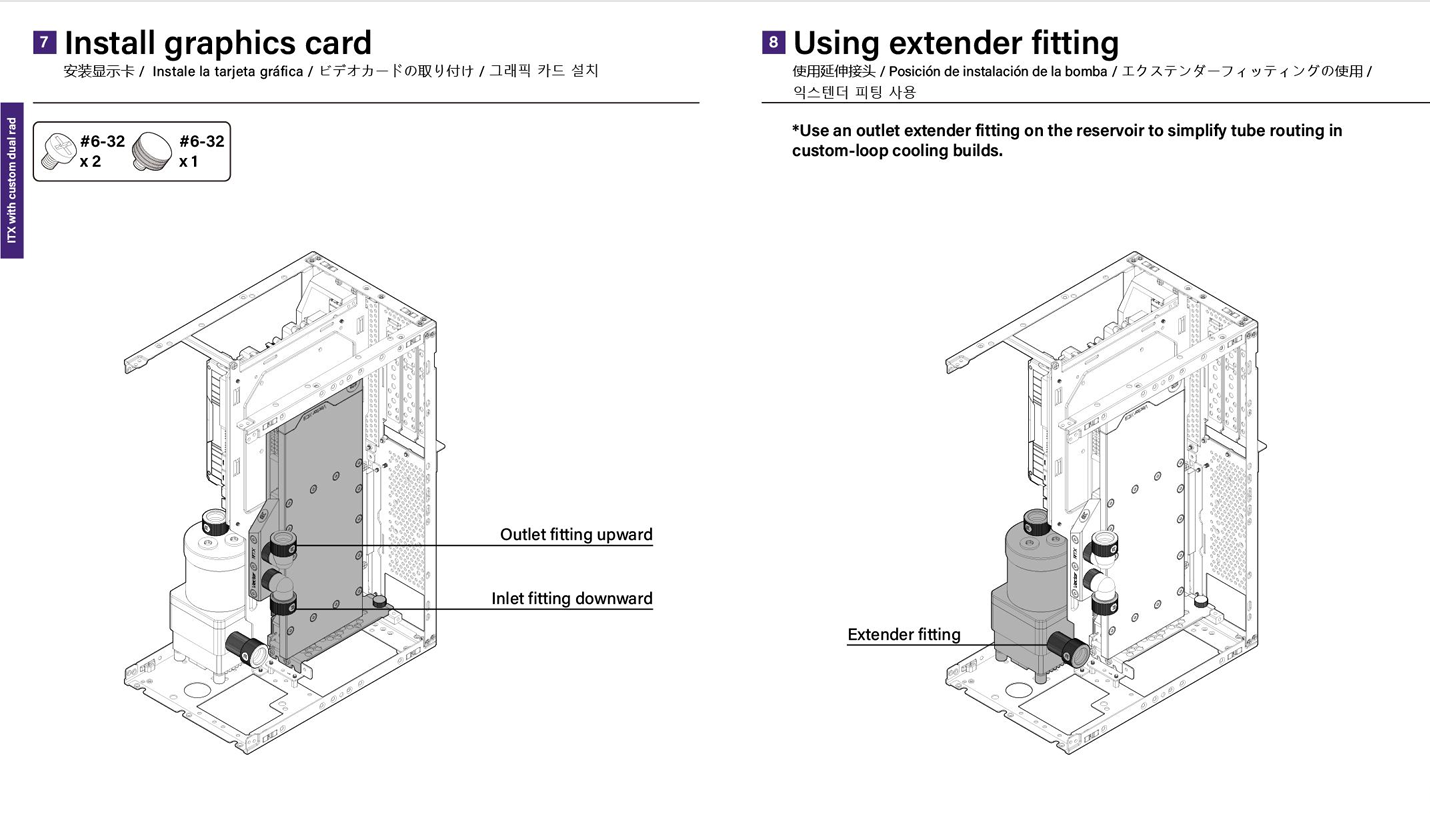
Step 3: Install Pump
 |  |
Step 4: GPU Installation & Water Block Selection
Install your modified GPU into the case.
Attach the water block and connect hoses using the correct fittings for your pump and block ports.
Note: GPU block modifications may void warranties and carry inherent risks—proceed at your own discretion.
Option A: 27 mm radiator + 25 mm fan (max. GPU thickness ≤ 21 mm) [Max radiator and fan thickness is 55mm]
Option B: 17 mm radiator + 25 mm fan (max. GPU thickness ≤ 31 mm)[Max radiator and fan thickness is 45mm]

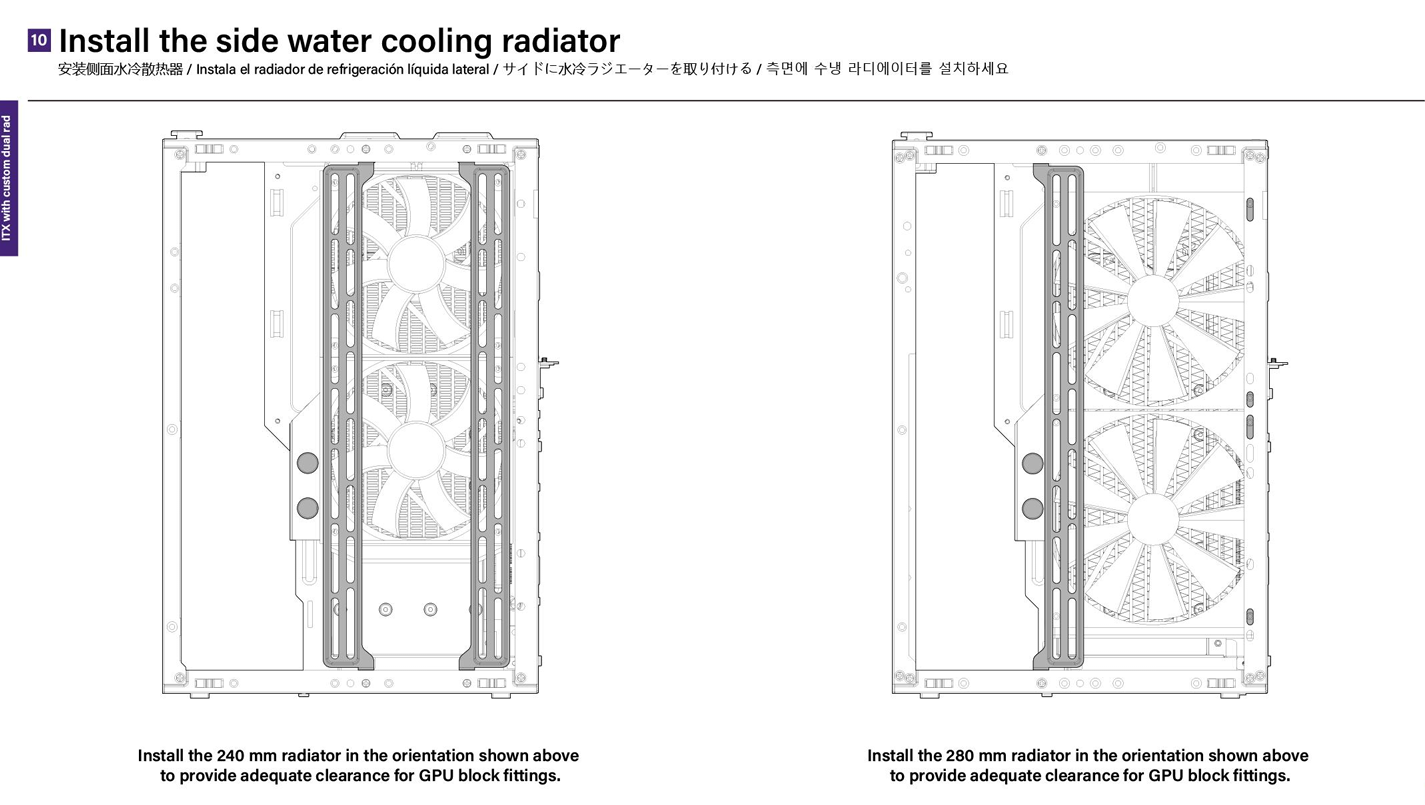
Step 5: Side Radiator Mounting
Method 1: Use two dedicated side‑radiator brackets.
Method 2: Mount one bracket and secure the other side of the radiator directly to existing side‑panel screw holes.
Step 6: Front Radiator (CPU) Installation


Step 7: Tubing Routing

Part 4: Tips & Reminders
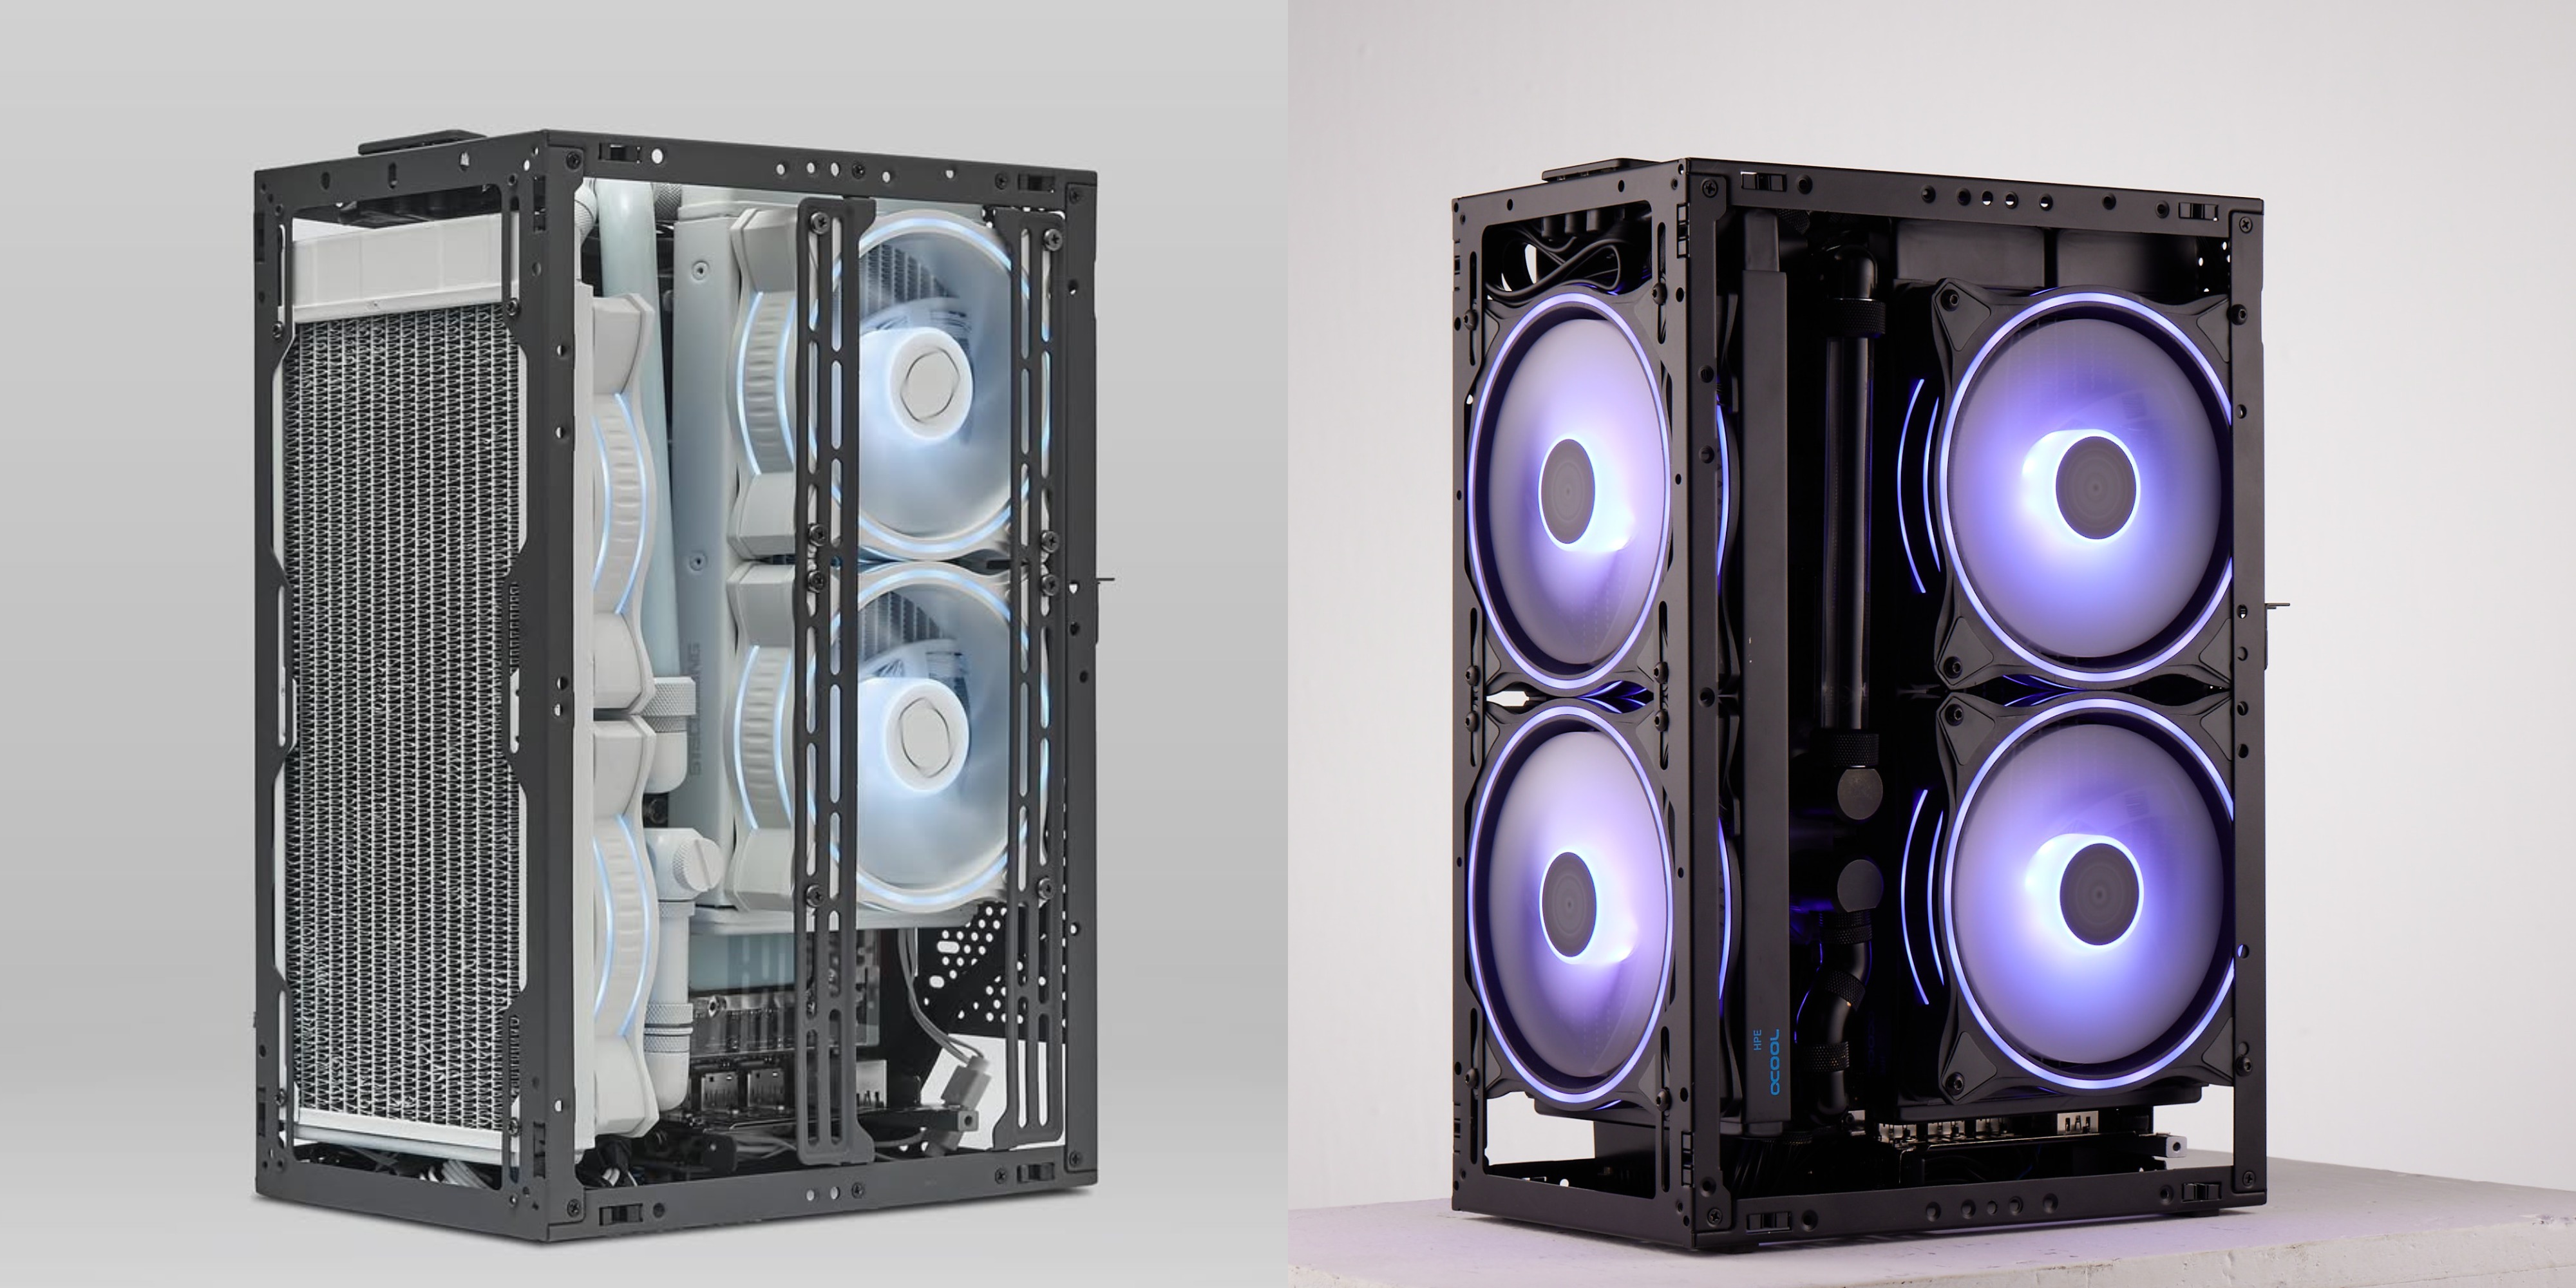
Fitting dual radiators in an SFF chassis yields diminishing returns. Balance cooling gains against build complexity.
DIY is as much about planning as execution—map out each step beforehand and enjoy the process!
Always double‑check clearances at each stage to avoid last‑minute fitment issues.
Was this article helpful?
That’s Great!
Thank you for your feedback
Sorry! We couldn't be helpful
Thank you for your feedback
Feedback sent
We appreciate your effort and will try to fix the article